Monday, August 4, 2014

Where The Hell Have I Been?!

I'M BACK!

It has been over a month since I've posted and I'm so sorry! I told myself I wouldn't neglect this blog and I have. I promise I won't anymore! 

So where have I been?

AT THE GYM. No, but seriously that's where I've been. And the usual taking care of kids. You're probably thinking, "the gym? What?" I'll tell you.

I've always been petite and for the most part I've been okay with it. I was blessed with good genes and a fast metabolism. But one day I looked in the mirror and wished I had more meat on my bones, that my family would quit teasing me about how thin I am. Now, I've had a gym membership for over a year that I've never utilized. I'd go here and there but nothing regular. I was on bodybuilding.com just browsing and there was a back workout being featured by Jessie Hilgenberg. It intrigued me so I clicked on it. I was definitely intimidated by the workout but LOVED Jessie's body. Since that day, I've been at the gym 6-7 days a week.

Fitness, getting strong, and filling out is my new obsession. I absolutely love the results that are happening. Everyone has their favorite day and mine is leg day. I went from no ass to ass in a matter of a month. 

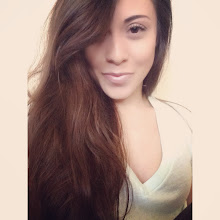
The picture above is from my Instagram two weeks ago. It's been a struggle but I love it. It's definitely been helping with anxiety as well. I wasn't even able to go to the gym a few months ago and now I'm going every day. I've found something I love and have gone full force with it. 

So that is what I've been up to the past month. I'm on this fitness journey and encourage everyone to do some form of exercise for at least 30 minutes a day. I guarantee you'll feel so much better. I'll be posting a little bit more about it, including workouts I hope some of you try. If you want to see more fitness things and pictures, you can find me on my Instagram: amandamarieeec or on Bodyspace on bodybuilding.com: amandamcastro

From my growing ass to you,
Amanda :)

P.s. The back workout I referred to you can find here -> jessiefit.com/backtraining

Friday, June 27, 2014

All About My Hair!

I always get questions about my hair. Let me tell you though, it took me four years to grow my hair out when I cut it at my ears. Yes, it was the worst mistake of my life. Recently, I just cut quite a bit off. Here's a before and after. 


My hair was at my hips and just a little out of control and too much for summer so I decided to cut some off a couple days ago. I'm still getting used to it and still a little sad but it's super healthy and a lot more manageable. 


Here's a quick rundown of the steps I've taken to keep my hair long and healthy:


Growing It Out

Growing my hair out, I hardly cut it. My hair is dark so when I had dead ends it was noticeable since they're white. I tried to get a trim every six months and only trimmed the smallest amount. 

Coloring My Hair

I don't. I would box color my hair darker but stopped two years ago. The beginning of this year I tried to go lighter but I didn't like it so I went back to my natural color. Not coloring your hair will keep it a lot healthier than if you do. Embrace your natural hair color!

Washing My Hair

I only wash my hair twice a week. Yes, only twice. If you wash your hair every day you're stripping your natural oils. Think of your hair like clothes, if you wash the same blouse every day it's going to end up looking dull and falling apart. It's the same thing with your hair. Because of the climate where I live, my scalp sometimes becomes dry. So I'll use T-Gel from Neutrogena to control that and it works really well. It's tar, so it smells like tar which isn't pleasant but after a few washes you get used to it. I'll only use that if it's a little out of control though. I'll usually wash my hair on Sunday and Thursday. On Sunday I'll shampoo (twice) and then use the Macadamia Natural Oil Hair Masque. I usually leave the masque on for 30-45 minutes. I'll put my hair in a bun on my head and just watch tv or something. If you want a more intense repair you can always put a shower cap on. Then on Thursday I'll just shampoo (twice) and condition normally.


FYI: If you're using a sulfate-free shampoo, which are better for you, it won't lather up as well. Some do though. But rule of thumb, if you're using a regular shampoo and it doesn't lather up, it means your hair is still dirty and you need to shampoo again. That's why I shampoo twice regardless.

After Washing

When I get out of the shower I put my hair up in a towel for about 15 minutes. Then I'll go in and spray It's a 10 or Sexy Hair Soya 22 in 1 and comb it through with a wide tooth comb. I'll then use Macadamia Natural Healing Oil on my ends. I almost always let my hair air dry. 


TIP: ONLY use a wide tooth comb when combing your hair when it's wet. Your hair is extremely fragile when it's wet so if you take a brush and brush through it you'll pull your hair out. 

Using Hot Tools

If I do blow dry my hair I'll use a blow-dry heat protectant. I use either use Redken's Prepping Blow Dry Lotion or Kenra's Blow Dry Spray. If I'm going to be curling or straightening my hair, I'll still use another heat protectant. I used Got 2 Be Guardian Angel and I liked it. I switched to Paul Mitchell's Hot Off the Press and Kenra's Hot Spray though. My straightener goes to 450* but I only use it at 410*. 

Oily/Greasy Hair

Because I only wash my hair twice, it does get somewhat oily. Dry shampoo will be your best friend. Most dry shampoos have a white cast which sucks for people who have dark hair like myself but don't fear, Batiste actually has one for dark hair. It also has a dark tint to it so you won't look like you have dandruff. Dry shampoo will also give you texture to help style it. 


*All the products mentioned can be purchased at Target and Ulta Beauty!


From my healthy hair to you,

Amanda :)

Wednesday, June 18, 2014

Waxing!

Let's talk about waxing. Wait, what did she just say? Yes, waxing that unwanted hair. At one point in your life I'm sure you wondered how painful it is. Well I'm here to give you the honest truth and what I use. 

Waxing can cost a pretty penny depending on what you're getting waxed and how often you need to have it done. A Brazilian wax alone can cost anywhere from $60-$75. Then if you want your eyebrows, armpits, legs, etc. done, you'll leave spending at least $150 if not more. That just wasn't something I was okay with spending. So I went to the Internet and started searching for at-home wax kits. It was either the cream wax or the hard wax.

There were positive and negative reviews on EVERYTHING just like there always is. I ended up going with the Gigi Brazilian Waxing Kit on Amazon that used hard wax. I crossed my fingers and hoped for the best. 


Alas, it arrived and I opened it up. Contents included were: 
- Wax Warmer
- Brazilian Body Hard Wax (14 oz)
- 10 Large Accu-Edge Applicators
- 10 Small Accu-Edge Applicators
- 10 Petite Applicators
- Pre-Epilation Oil (2 fl oz)
- Post Wax Cooling Gel (2 fl oz)
- Professional Brazilian Hard Wax System DVD

Everything was there and nothing was damaged. So I started the warmer and popped in the DVD. Just a forewarning, if you're not okay seeing a va-jj (vagina), then skip the DVD. It's a demonstration on how to use it with an actual client to show. I watched it and it didn't really help me. Youtube videos was how I ended up figuring it out.

I checked the wax and it was warm enough so I went to my armpits. I hate that word armpits, does anyone else? Anyway, I used the oil and made sure to wipe it away with a paper towel. I then took some baby powder and put it on to soak up any excess oils. I slabbed some of the wax on and let it cool. I tried to lift it with my fingernail and because that skin is so sensitive it looked like I either had a bruise or a hickey on my pit from trying to lift it. I have a fairly high pain tolerance level having gotten tattoos and piercings so I didn't expect it to hurt too much. I counted to three in my head and pulled. HOLY SHIT it hurt! I had put some wax on another section and I didn't even want to pull it off. And forget doing the other side. 

I sucked it up though and I did the other section and the other arm too. It hurt just as much but I couldn't have one smooth pit and not the other. That's not cute. It worked really good. It pulled the hair out from the root. You don't realize how much hair you have until you wax it and see it all on the strip. It's pretty gross. 

After I finished my arms I figured I'd give my legs a whirl. It hurt but it didn't hurt as bad. However, I don't recommend a hard wax for legs. It may just be my and my sister, because I tried it on her too, but it didn't grab on to our leg hairs. It would've taken hours to wax both and get everything if we would've kept trying. So that was a bust. 

However, my armpits stayed smooth for 3 weeks. So was waxing them and the pain endured worth it? Hell yes. When I went to do it again, it hurt so much less. I thought, well let me use this kit how it was intended to be used, on my va-jj. Now I was scared shitless, don't get me wrong. 

I prepped and was ready to go. I put a layer on the top part, under your bellybutton, and let it cool. I was not mentally prepared for this one. I pulled and it hurt worse than my armpit and I didn't think that was possible. I realized I needed to go in small section because it was just too much for me. I ended up only doing the top part and that was it. Forget anything else, it was too painful. But it stayed smooth for three and half weeks. Worth it? Yes.

I decided to give it another shot and do everything. This time I took two Advil to help with the pain. The top didn't hurt nearly as bad. I don't know if it was the Advil or my self talk but the rest didn't hurt too bad. Towards the inner parts, it's way more sensitive so it was unpleasant but tolerable. 

I love this kit. I eventually ran out of sticks so I ordered a box of 350 in different sizes for $10. The hard wax refills are between $10-$12 on Amazon and I've reordered those as well. Once you do it the first time, the next time is so much easier and a lot less painful. Waxing for me is a way of life now. I feel a crap ton better and cleaner haha. You seriously can't beat the price either. It's weird at first but you eventually get the hang of it and the temperature down right. Try waxing, I bet you won't go back!

From my smooth pits to you,
Amanda :)

Saturday, June 14, 2014

Time To Get Personal

I know my blog has been geared towards beauty but I thought I'd share something with all of you that is one of the most personal things in my life. I absolutely hate talking about it because sometimes I feel like it's a weakness of mine and it's very difficult to fully grasp it unless you're going through it. It is one of the hardest things that I deal with on a daily basis. I think some of you will finally understand why I am the way that I am, why I decline some invitations and why I've never asked for a ride anywhere.


When you look at me you'll see what I want you to. You'll see a pretty face but you'll never guess that I suffer from agoraphobia. I'm sure some of you are about to open up google and look up what that means but I'll tell you. "Agoraphobia is an anxiety disorder in which you fear and often avoid places or situations that might cause you to panic and make you feel trapped, helpless and embarrassed." (Mayo Clinic)

I call it a fear of a fear. I'm scared of being scared basically. I've had this for the last 10 years and I still don't know why or how it happened. Sometimes there isn't a reason either. I used to do everything and go everywhere and now I'm very limited to both. I won't go into huge detail about everything because I could probably write a book on it but I'll give you the gist of how it's affected my life. 

When you have anxiety, you have a safety net and comfort zone. Your safety net is usually your home or work place. Your safety zone is the area where you're comfortable going to. It might be down the street, around the block, or within the city. Until you go outside that comfort zone, is when anxiety will start to creep up. We feel safest in those areas and have become used to it that we don't get anxious because we know our escape route if we ever needed one.

Escape routes are huge for people with anxiety. If ever see me looking around, it's not that I'm ignoring you, it's that I'm looking for all exits possible to plan out my route if I ever needed to get out fast. I have gps on my phone but I also have a gps system for the car. Getting lost is not something you want to do when you have anxiety. 

For me personally, I've been homebound twice not able to go anywhere. So for those of you that thought I was pregnant when I left halfway through freshman year, you were wrong. I couldn't make it out the front door, let alone to school. And then having to walk that huge campus from class to class, there was no way. (I did go back my sophomore year and finished out the next 3 years on campus.)

I would have a panic attack if I just thought about going somewhere. And once I thought about it, my mind went into overdrive and I would think of all the possible outcomes that would happen. When I had my first panic attack, I was in the car. So a car, any car, is an anxiety trigger for me. 

Because of the car trigger, I don't drive with almost anyone. The three people that I will allow to drive me anywhere are my mom, dad and sister. The reason being, not many people have witnessed a panic attack happening and would probably freak out if they did. When I'm having an attack, I can be the only one freaking out. Also, all three of them have witnessed me getting sick so if I were to get sick, they wouldn't judge me or make me feel embarrassed like I would if I were with someone else. 

A huge thing that causes me anxiousness is time. How long something will take. When you're anxious, you don't want to wait. The longer you sit, the more anxious you become. I hate sitting at red lights. If there's a way around them, that's the route I'll take. 

A couple years ago I was doing really well with my anxiety. I was working, going places, doing things. It was really starting to look up. And then, in the blink of an eye, on my way to pick up my dog from my then boyfriend's house, I had a horrible feeling rush over me. It was a panic attack. I went into flight mode. I flipped a U on a red and sped to my work place which was in between his house and my house because it was a safe zone for me.

Having an anxiety attack is extremely uncomfortable. My body goes cold, my heart races, my hands sweat, I'm cold but burning up at the same time, my stomach hurts to the point that I think I'm going to be sick and the entire time my brain is telling me, "Run! Run! This is not safe!" So I got the hell out of there. Since then things have been difficult and I've regressed. 

There is a list of things I cannot do and places I cannot go right now; the movies, amusement parks, certain restaurants, long drives, etc. If you've invited me somewhere and I've declined, it's not because I didn't want to go, it's simply because I couldn't. At least not right now. I'm trying to get back to where I was because I know it's possible, I've done it twice before. It's just a matter of time.

I have lost relationships because of this but I'm okay with that. I look at it this way, your vows when you get married say, 'in sickness and in health' and when I was sick, they left. Why would I want that? I can be mad at God, and boy was I for the longest time, but I realized it's not punishment. It's to show me just how strong I am. He doesn't give you anything you can't handle. 

If you are suffering with anxiety, know that you are not alone. I may not be where I want to be at this point but I'm going to try harder and push myself. It's all about reprogramming your brain to not throw up the caution tape in situations. The three things I always try to tell myself and you can too if you have anxiety is:

1. You cannot die from a panic attack.

2. If you get sick, so what? Get the car cleaned. Plus you'll probably never see those people driving next to you again.

3. ALWAYS decastrophize the situation. If you're thinking of all the horrible things that could happen, stop and think of the good that could happen. And usually even the worst thing that could happen, isn't all that bad once you think about it.

Well I hoped you learned a little or a big something about me and understand a few things more clearly now. Anxiety is a hell of a disorder but it is curable and you can overcome it and never have it again. That day is the day I cannot wait for. Also, a big thanks to the few that know and have helped me throughout this and continue to help me.


From my imperfect anxious self to all of you,

Amanda :)

Thursday, June 12, 2014

Get Ready With Me | Red Lip

Here's a makeup look featuring a bold red lip, I hope you enjoy! Below is the step by step process I used when creating the look to better help with what exactly I did. <3


Foundation and Concealer:

I used Philosophy's Hope in a Jar to moisturize after showering before starting the video. With summer and the heat a primer is pretty essential plus it helps even out my skin tone. For this video I used Benefit's Porefessional. I mixed Loreal True Match Foundation in shades W2 and W3 together on the back of my hand and applied it with a Beautyblender sponge. I went in with Mac's Pro Longwear Concealer in NC15 as a concealer and highlighter and applied it under my eyes, along the bridge of my nose, cupids bow, and forehead and blended it out with the Beautyblender. To set the concealer I used Mac's Prep + Prime Finishing Powder with an Elf blush brush.

Eyebrows:

I'm not going to lie, I suck at doing my eyebrows. I don't have the technique down and quite frankly I'm a little lazy but I did what I could for the video. I used Anastasia Beverly Hills' Brow Wiz in Brunette. Since I bought mine I guess they've changed the name to Dark Brown instead of Brunette. I went over and sort of set that with Whitening Lightning's Brow Bar to Go. After the video I used the wax in the brow bar to keep my unruly brow hairs down, haha. Anyway, moving on to eyes.

Eyes:

I only used one palette for this video and that was the Lorac Pro Palette. I kept the eyes simple since I was doing a bold red lip. A bold eye and bold lip clashes with each other. You usually end up looking like a clown. I took Taupe in palette with a Sigma E40 and put it in my crease. I then took Lt. Bronze on a Sigma E55 all over the lip. It's one of the shimmer colors in the palette but it's a very subtle shimmer. I then took Mauve on a Mac 217 and pushed it in the outer corner and up into the crease just to give a little definition in the eyes. Then I took that same E40 and blended everything out.

Face: 

I contoured my face with Nars Lagoona Bronzing Powder using a Sigma F05 brush. I hit the hollows of my cheeks, forehead, chin and dragged it onto my neck. I used my favorite blush, Mac's Melba on my cheeks. It's just the perfect neutral shade. I wear it year round. I'm staring at my hand since I just swatched it and the main color that I see is peach but a nudey peach. Anyway, I used a Bhumi blush brush to apply it on the apples of my cheeks. I took my Sigma F50 Duo Fibre brush to blend everything out and make sure there were no harsh lines. And to give a pretty glow I went in with Mac's Soft and Gentle Mineralized Skinfinish as a highlight on my cheek bones and cupids bow.

Eyelashes:

I curled my lashes with Japonesque's Eyelash Curler. This curler is the bomb. I've tried drugstore and the Mac one and this one is better than all of those. I did one coat of Loreal's Telescopic Shocking Extensions Mascara, the waterproof formula, because using waterproof before your regular mascara can help make the lashes look fuller. I then used Loreal's Telescopic Carbon Black Mascara and coated my top and bottom lashes. And finally, this wasn't in the video, I finished it off with Too Faced Better Than Sex Mascara. I know, it's a lot of mascara but I'm not a false eyelash wearer so I do what I can to make my lashes look long and full as if I were wearing falsies. 

Lips:

Before the video I put on Maybelline's Baby Lips lip balm to make sure they were moisturized. I used Rimmell's Scandeleyes Kohl Pencil in Nude as a lip liner. I used it as a base around my lips and because it was nude, it acted like a concealer so the color wouldn't bleed throughout the day. I took Mac's Myth lipstick and put it in the middle of my lips because I wanted it to be a little lighter since the red we're about to go in with is VERY red. Now for the big mamajama is Mac's Russian Red lipstick. 

For the final touch, I locked in my makeup with Urban Decay's Chill Setting Spray. And boom, we're done!

By the way, my hair is three day old hair. I sprayed it with Batiste Dry Shampoo before filming and combed it through. It's always a mess so don't pay any attention to it haha.

I hope you enjoyed it! If you have any suggestions, leave them in the comment section either here or on the video! Oh, and I tried to find links to all the products. Loreal and Rimmell are drugstore brands so you can find them at any drugstore, Target, Rite Aid, etc.

Thank you!
Amanda :)


As a disclaimer: I did not make the music I put to the video. 
Picture Perfect - dFonz
Seth is a good friend from high school and his music is amazing. Picture Perfect is one of my all time favorite songs. I listen to it at least once a day. If you like it, you should check out his Soundcloud and Youtube -> soundcloud.com/dfonz and youtube.com/sdfonz
Do It Like A Dude - Jessie J
Classic - MKTO  

Equipment: Macbook Pro
Edited on: iMovie


Wednesday, June 11, 2014

Easiest Way To Clean Your Makeup Brushes

It's the dreaded day when you just know it's time to clean those makeup brushes. If you only have a few brushes then it's not so bad but when you have a lot, it can be time consuming.


How often should you clean your brushes? You should probably clean them once a week. There have been times I've cleaned mine after two weeks though but I only use my brushes on myself. It's easier to get all the product buildup off if you do it once a week though. If they're being used for clients, obviously you need to disinfect them after every client. 

I was using the dawn dishsoap and extra virgin olive oil to clean mine but I found an even better way..the Blendercleanser Solid by Beautyblender. It's one step and so easy to use.


(Difference between and new and used one)

How do I use it? 

All I do is wet my brush, making sure to not get water above the barrel.
FYI: Getting water above the barrel can cause it to rust and the barrel will ultimately fall off and ruin your brush.

Then take the brush and swirl it in the cleanser.


Then take the brush & swirl the brush with the cleanser on my hand to work it into the bristles.


Wash the cleanser off and hang to dry! 


I use this Benjabelle Brush Tree to dry my brushes. It's such a nifty & great product. I've had it for about a year and a half & there are no chips or anything. This is the only one they had when I bought mine but they have since made quite a few different ones. Very easy to clean as well.


I like cleaning my brushes at night and having them dry over night. You can see I've got some Real Techniques, Mac, Sigma, Bhumi, Sonia Kashuk brushes and a Beautyblender. And no, I don't use these all on a daily basis. Haha. If you have a ton of brushes and you don't like your hands to look like prunes, I'd look into the Sigma Spa Brush Cleaner. Although I don't have one, I've heard a lot of great things about it from beauty guru's.

Happy brush cleaning!
-Amanda :) 


Monday, June 2, 2014

On Trend This Summer

What's on trend this summer? That's a good question because I have no idea. I'm not one to keep up to date with fashion trends. I tend to wear whatever I feel looks good on me or whatever is comfortable. Honestly, if I could wear sweats year round I would. 

I do think that this summer we're going to see A LOT of floral prints, bright colors, high waisted shorts, flowy dresses, bright nail polish and crop tops. Or is that just me minus the high waisted shorts? 

I've never been a floral type of person. I've always felt that pink just wasn't my color and I couldn't pull off too many dresses. But I was sort of digging the floral vibe I've been seeing a lot of. I decided I needed to add a few more pieces to my closet (that really can't fit anything else) but I didn't want to spend a fortune so I went on Forever 21's site. I've never been a huge fan of their store but I know it's fairly inexpensive so I figured I'd give it a shot...and HOLY MOLY FLORAL HEAVEN! 

They have so many cute floral dresses, shirts, shorts, etc. I got a few dresses, a crop top and a shirt. I'm thinking I might need to order a few more things this month because I really like them. 5 items for $60 is a win in my book. Here are a couple of the pieces from there that I've worn: 


Whatever you decide to wear just make sure you rock it! Don't worry about keeping up with the trends, just wear what you want to wear and have fun. Don't forget to try different things, you just might like it.

From my floral loving clothes to you,
Amanda :)

Tuesday, May 27, 2014

Products I'm Loving Right Now

I thought about doing a May Favorites and I suppose this could count as one, except it doesn't include ALL of my favorites, just the products I use on a daily basis that I absolutely love.


I'm a makeup cleansing towelette kind of girl. I like taking my makeup off before I go in with a wash. I really try to limit the products I use on my face because I have sensitive skin. I've tried the Nuetrogena towelettes and they made my skin red and itchy. The Ponds brand has always been good to me. I was using the regular ones for the longest time but saw these Ponds Evening Soothe with Chamomile & White Tea ones. Since I bought a pack, I haven't gone back to the regular ones. They take all of my makeup off and I get them from Target. A lot of times they are two for $8.


I've been switching off between facial cleansers. I've used the heck out of my Purity Made Simple One-Step Facial Cleanser and I really like it. It removes so much. I like using it in the morning just as a refresher. It is formulated to rapidly dissolve dirt and makeup while deep cleaning pores. 


I also have been using Josie Maran's Argan Cleansing Oil that was paired with her well-known oil which I really like as well. I don't grab for it as much as my moisturizer though. The cleansing oil works amazing. It doesn't dry out my skin or anything. However, it doesn't remove ALL of my makeup if I use it on its own. If I use the towelette's first, then it'll get all of the excess makeup off.


My favorite moisturizer for my face of all time is Philosophy's Hope in a Jar. It's the best for my sensitive skin. It's not too thick and is very moisturizing. I use it both at night and in the morning. The scent is just a regular smelling type lotion scent.


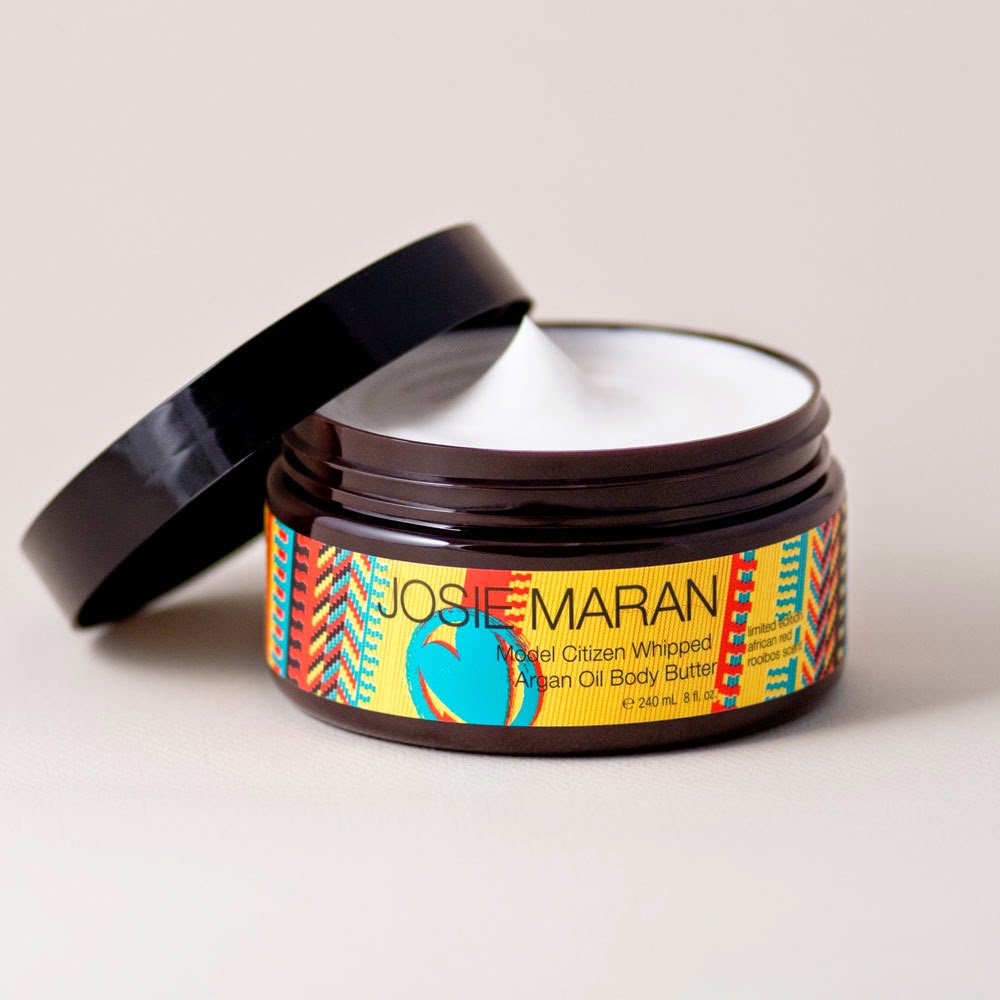
The best body butter is the Josie Maran's Model Citizen Whipped Argan Oil Body Butter. It is limited edition so I suggest going to get it now before it's gone. I went and got a second jar because I am not ready to part with it when it's discontinued. It has an amazing scent. It's not too warm and not too cool. It's also not incredibly thick like some body butters are. It dries fairly quickly and doesn't stick to my sheets when I put it on before bed. When I get up in the morning I still feel soooo moisturized.


I recently started putting effort into my brows and am in love with my Anastasia Beverly Hills Brow Wiz. The tip is very small and easy to work with. It's effortless when doing your brows.


I'll usually pair my brow wiz with my Whitening Lightning Brow Bar to Go. It comes with two brow powders and a wax to tame those unruly hairs. I can use this even when I don't use my Brow Wiz. I have to have one or the other or both.


I've tried drug store and the Mac eyelash curlers but my holy grail is hands down Japonesque Ergo Grip Eyelash Curler. This puppy curls the shizz out of my eyelashes and it doesn't pull any out.


Mac's Melba Powder Blush is my go to blush all year round. It's just that perfect shade. It's not too dark and not too light. It's just perfection.


My favorite palette of all time right now is the Lorac Pro Palette. It has 8 matte shades and 8 shimmer shades. The different eye looks with this palette are endless.


The most talked about lip product on the market right now is the Bite Beauty Agave Lip Mask and it is worth the hype. It is intense and works so good. A little goes a long way. I'll put this on at night and wake up and it's still on. It's very moisturizing for your lips.

If you haven't tried any of these products, I definitely recommend them. What are some of your favorites? I'll be doing my favorite brushes in a different post!

Happy Tuesday,
-Amanda :)
Wednesday, May 21, 2014

Who's the Girl Behind This Blog?

I realized I started off this blog without really "introducing" myself. How rude of me! In case you were curious as to who I am and who's the one behind the computer typing up these awesome posts, keep reading! :)

I'm Amanda. I will be 24 years old in a week and I'm 5'4.25", yes that quarter is necessary. Haha. I'm currently a stay-at-home caregiver to a three year old little boy named Jack, whom my family has guardianship of. We also have his sister who I watch after, when she gets home from school. I live in the most bipolar weather state there is, California.


I LOVE makeup. You can say I'm YouTube taught because I have watched videos for as long as I can remember. I was born with the tomboy gene so I needed some guidance on makeup and hair as I got older and started to care about how I looked. I first started watching Kandee Johnson and loved her - still love her. I now also watch Nicole Guerriero, Jaclyn Hill, Casey Holmes, SMLx0 and quite a few others. They've taught me sooooo much! 

A couple rando's about me:
  • I love Taco Bell - it's pretty bad
  • I am extremely sarcastic and I love to joke around
  • I'm 75% Mexican and 25% White - you wouldn't know by my light skin and slanted eyes though haha
  • I have a 7 month old Boxer named Ellie 
  • I play World of Warcraft (I'm not very good) - holla at all my gamers haha
  • I have my paralegal certification 
  • SF Giants, SF 49ers and San Jose Sharks fan
  • I'm agoraphobic
  • I've taught myself to play 5 instruments
  • I'm one of those kids who's parents are divorced and love it haha
  • Law and Order: SVU is my show. I watch the reruns like nobody's business. The USA channel has a marathon every Tuesday, which makes it one of the best days out of the week for me.
  • My favorite ice cream is Coldstone chocolate ice cream with a crap ton of gummy bears!
Those are just a few random things about me to sort of sum me up. I'll be starting to post more often and it's a sort of all over the place blog that's going to consist of makeup (duh), hair, raising the kids I watch, just life! I hope you stick around and come back!

Happy Hump Day,
-Amanda

Monday, May 19, 2014

Get Ready With Me | Fast Forward

I was about to get ready when I had this bright idea to roll my Macbook and film it. When the baby is sleeping, I sometimes get bored. Haha. Here's my first ever video and post on YouTube! Apologies in advance for the poor lighting and everything else. I'm not a pro and I used iMovie to edit. Don't forget to upgrade in HD!

Hope you enjoy! 


Products Used:

Benefit Porefessional
Loreal True Match
Mac Pro Longwear Concealer
Mac Prep + Prime 
Rimmel Stay Matte Pressed Powder
Mac Melba 
Nars Lagoona
Lorac Pro Palette 
Whitening Lightening Brow Bar to Go
Anastasia Beverly Hills Brow Wiz
Too Faced Perfect Black Liner
Loreal Telescopic Mascara
Too Faced Better Than Sex Mascara
Eos
NYX Butter Gloss in Maple Blondie
Mac Fix+ 


Happy Monday,
-Amanda :)

Saturday, May 17, 2014

Tattoo Tag!

Tattoos used to be one of those things you didn't talk about. It was taboo. You were a delinquent or a bad person if you had any. Well guess what? It's 2014 and it's becoming a fad now and I couldn't be more stoked about it. Tattoos are amazing when they're done right and even more so when there's a story behind them. Also, I absolutely LOVE color tattoos.

How many tattoos do I have and where? Well I'll tell ya!

I got my first tattoo when I was 19, in 2009. I didn't know what I wanted or what the pain was going to be like. I just knew I HAD to get one. I stuck to something small on the back of my neck. Your typical heart is what I went with. It had no meaning, I just wanted to get it. 


Let me tell you, I barely made it out alive. I was so nervous before that I didn't eat. Bad idea. I became light-headed, dizzy and nauseous. The lines were supposed to be thicker but I couldn't handle it. My sister took a picture of me hurled over a trash can ready to spew but luckily I didn't. (TIP: Always eat and hydrate before getting a tattoo. Trust me.) I have yet to get this tattoo touched up because I've realized, I don't like getting a tattoo where I can't see what's going on. I'm hoping one day I'll touch that puppy up but for now it's not a priority of mine.

I decided to try the tattoo thing again but this time I knew what I wanted. I got two tattoos in 2010. First I got a Bible verse, 1 Cor. 13:4-8,13 which reads, "4 Love is patient, love is kind. It does not envy, it does not boast, it is not proud. 5 It does not dishonor others, it is not self-seeking, it is not easily angered, it keeps no record of wrongs. 6 Love does not delight in evil but rejoices with the truth. 7 It always protects, always trusts, always hopes, always perseveres...8 Love never fails. But where there are prophecies, they will cease; where there are tongues, they will be stilled; where there is knowledge, it will pass away... 13 And now these three remain: faith, hope and love. But the greatest of these is love." I was in a really bad relationship and the break-up wasn't any better and I wanted, no I needed something to help keep me going. Something to remind me the kind of love I deserve. I had it placed on my left wrist because it's my ring finger hand and I wanted to be able to see it every day. It's been a great reminder going through trials and tribulations since.


A few weeks later I decided to get hip tattoos. I wanted something that matched. I went with music notes with wings. Not many know this, but I'm musically inclined. I took band in grade school and taught myself five instruments. Music in school really helped me get through things. I'd write songs, poems, try to make up my own chords and even started practicing to audition for a music school. 


Sorry the lighting is so bad on this one. As you can see, it needs to be touched up. I've put it off because it hurt so BAD. I didn't expect it to hurt as bad as it did. This was by far the most painful tattoo I have gotten yet. (TIP: Do not wear jeans or any type of clothing that will rub on your tattoos. It will cause the color to fade. I unfortunately wore jeans after getting this done and it messed it up quite a bit.) Because of how bad these hurt, I count them as two separate tattoos. Haha!

My fifth tattoo I got in February 2011. I always wanted to get tattoos resembling my family. I had become really close to my little sister during this time. She's the only full-blooded sister that I have. I decided to get her birth flower and my artist suggested using her initials as the stem and I loved the idea. This was how it came out. The foot wasn't too bad pain wise. My leg twitched at times uncontrollably and I kept sweating! The closer to the edge he got, the more it hurt. The worst part was the next day. My foot swelled and throbbed. It was not fun.


And we come to my last and most favorite tattoo, my sugar skull. My grandma became sick with Lou Gehrig's Disease (ALS) and she was slipping away from us very fast. I wanted to get something in remembrance of her. I started the piece before she passed and finished it after she took her last breaths. 


She was full Mexican and a Day of the Dead skull just seemed right for a remembrance. There are 5 roses, for her 5 granddaughters including myself. I chose the rose because it is her birth flower. The only thing I asked of the artist was for the candle to be a traditional red and the roses to be yellow. He did everything else. I absolutely love this piece. 

Tattoos are a beautiful thing and the fact that they're starting to be normalized is so awesome. 

From my inked body to you,
-Amanda :)


*All photos posted were taken today May 17, 2014.

Wednesday, May 14, 2014

Buxom Nudes and Brights

Hi guys!

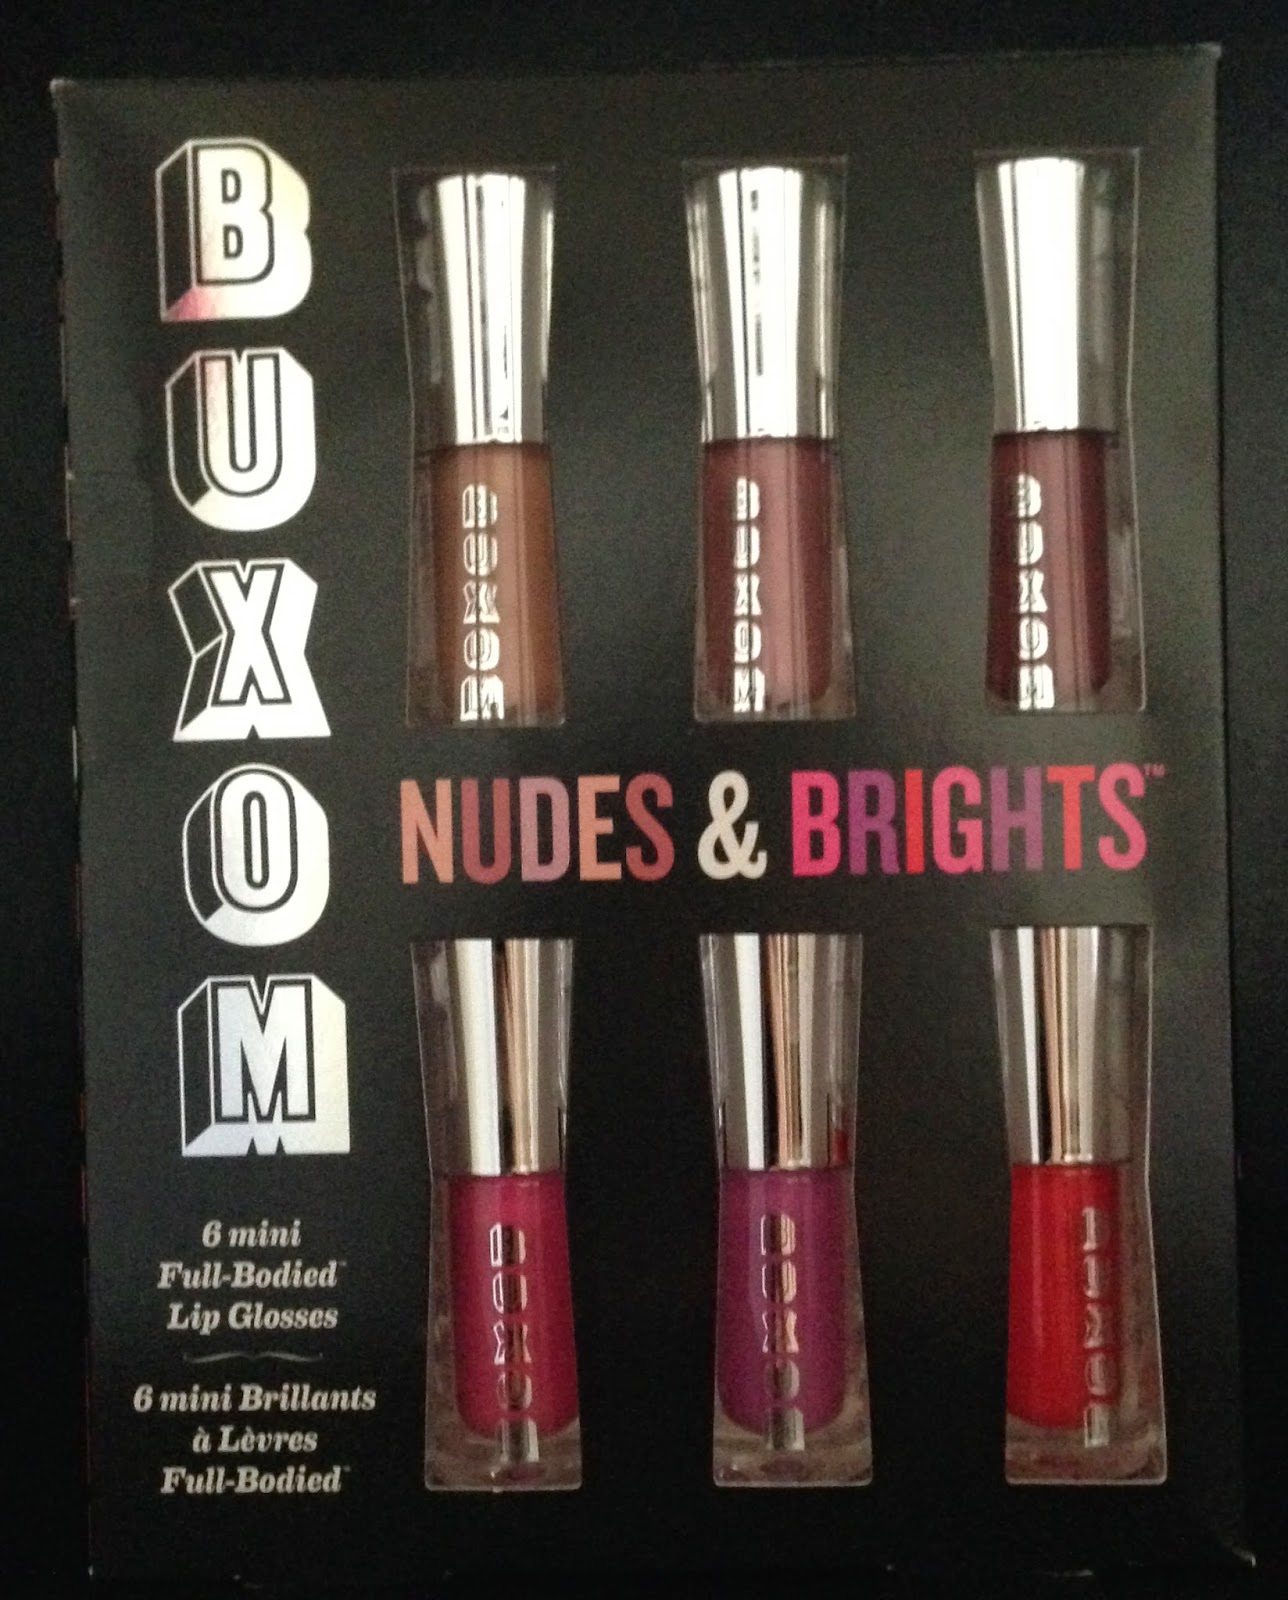
I sort of went a little crazy on Sephora's website recently and spent enough to get me to the VIB status. So yes, I spent quite a bit. One of the things that caught my eye was the Buxom Nudes and Brights lip gloss set. It was $32 with a retail value of $51. 


I've heard a lot of great things about the Buxom line and thought this was a good way to try six of their colors out without breaking the bank. Below is a little swatchy, swatchy.
From left to right: Yes You, Mwah, Dolly, Strut It, Pucker Up and Cha Cha Cha

Aren't they so pretty?! And I love the names of them. When I went to try them out on my lips, Yes You and Mwah didn't show up too well. But I'm thinking with a lipstick underneath, they'll give that perfect bit of nude you need. 


The dofa applicator is flat on both sides, so instead of having to dip the applicator back in after one use, you can flip it over and use the other side. I'm definitely pleased with this buy. They weren't too sticky, which is what I look for in a gloss. Nobody likes to rub their lips together and it feel like there's sticky glue on them. I think Cha Cha Cha is going to be a staple for me this summer. It's the perfect bright coral color. These Buxom glosses were a definite hit!

From my glossy lips to yours,
-Amanda :)

Tuesday, May 13, 2014

tarte Brazilliance Maracuja Self-Tanner

First Impression/Review


I recently bought the Tarte Brazilliance Rejuvenating Maracuja Face and Body Self-Tanner. Phew, say that 10 times fast. QVC was having a one day deal where you would get the self-tanner (11 oz - double the size as the original), mitt and self-tanning face towelette's (5) for $49.98. With shipping and handling added, the total came out to $60.95.

Originally the tanner is $39.99 for 5.5 oz (half the size of the QVC deal) and mitt. The towelette's you'd have to buy separately at $21.00 for 10.

I'm all about trying new products so I jumped at the deal. I took a shower and exfoliated the night before with Lush's Sea Salt Scrub, shaved and then used the self-tanner right before bed.

TIP: Do not apply self-tanner right after you shave because the tanner will seep into your pores and you'll have these dark dots all over your legs and that is not cute. You should wait about a couple hours before applying.

Now on to the application.
The first thing I noticed was the smell. It wasn't a gross fake tan smell, you know exactly what I'm talking about. The smell was pleasant and tolerable. The tanner comes out as a dark brown color and it does have a slight tanning guard so you can tell where you're applying it.
I did feel as though most of the tanner was being absorbed into the mitt. I did two coats of tanner to my body. I did not use the face towelette's because you have to wash your hands right after using it and I didn't want to wash off the tanner I had put on my hands. The tanner takes about 8 hours to develop so I put it on before I went to bed and off to sleep I went. 

I have white sheets so when I woke up this morning I expected some of the tanner to have gotten on my bedding but surprisingly there was none! My skin was quite brown from the color guard but I hopped in the shower and rinsed off. I was a little disappointed that after rinsing off, much of the color was gone. I put my moisturizer (I prefer a body butter) on and have gone about my morning. 

TIP: To help the longevity of your tan, always moisturize. Use a wash cloth in the shower instead of a loofa and try not to shave because you're tan will come off on the razor.

So what do I think of this product?

PROS: The application was easy, the smell was great, it didn't stain my fingernails and it didn't come off on my sheets.
CONS: The color isn't as dark as I had hoped, even after two coats, and most of the product seemed to have absorbed into the mitt when applying.

FINAL THOUGHTS: This is a good product if you're new to self-tanning or if you just want a really subtle looking tan. For the price and what I received, it was a good buy for me. If you're looking for that deep, dark tan like you just spent a week on an island this is not the product for you.

I hope this helped some of you. Remember, stay out of the sun! Skin cancer and wrinkles are not cute. Self-tanning for the win!

-Amanda :)